16.2 The Key Manager workflow
The Key Manager workflow allows you to store keys; for example, the transport key for a key ceremony, or a PIV 9B key.
For information about PIN generation keys, see section 9.1, Adding a PIN generation key.
Some keys are used for specific device types:
-
For information about initialization keys, see the Initialization keys for eToken 51xx section in the Smart Card Integration Guide.
-
For information about PIV PUK and Configuration Lock Code keys for YubiKey devices, see the Setting up the PIV PUK key and Setting up the Configuration Lock Code sections in the Smart Card Integration Guide.
If you have a PIV system, you need to enter the values of secret shared keys to enable the smart card management system to authenticate (and therefore manage) the smart cards.
9B keys and related specifications are defined in SP800-73-4 – Interfaces for Personal Identity Verification available from the National Institute of Standards and Technology (NIST) website at www.nist.gov.
Warning: If new keys are imported to or generated on the HSM during this workflow, you should take a new backup of the HSM. Keys stored on he HSM are business critical data.
16.2.1 Transport keys
To add a transport key (also known as a zone master key):
-
From the Configuration category, select Key Manager.
You can also launch this workflow from the Configuration Settings section of the More category in the MyID Operator Client. See the Using Configuration Settings workflows section in the MyID Operator Client guide for details.
-
From the Select Key Type to Manage list, select Transport Key(ZMK) and click Next.
Note: If you have only one key type defined in your system, MyID automatically selects that key and proceeds to the next stage.
-
Click Add New Key.
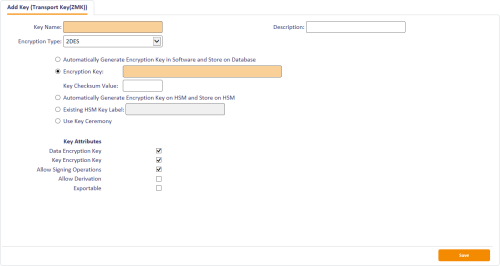
- Type a Key Name and Description.
- Select the Encryption Type from the drop-down list.
-
Select the attributes for the key:
- Data Encryption Key – the key is used to encrypt data (DEK).
- Key Encryption Key – the key is used to encrypt keys (KEK).
- Allow Signing Operations – the key is used for signing.
- Allow Derivation – the key can be used to derive individual keys.
- Exportable – the key can subsequently be exported.
-
Select one of the following options:
- Automatically Generate Encryption Key in Software and Store on Database – the key is automatically generated and stored in the database.
- Encryption Key – type the key into the box. Optionally, you can include the KeyChecksum Value.
-
Automatically Generate Encryption Key on HSM and Store on HSM – this option generates a key on the HSM.
Note: The HSM options appear only if your system is configured to use an HSM.
- Existing HSM Key Label – if you have an existing key on your HSM that you want to use, type its label.
- Use Key Ceremony – if you have the key in key ceremony format (encrypted by a Transport Key), select this option. When you click Enter Keys, the key ceremony wizard will launch, allowing you to enter the key ceremony data into the database or HSM (if available). See section 16.2.6, Entering keys using a key ceremony.
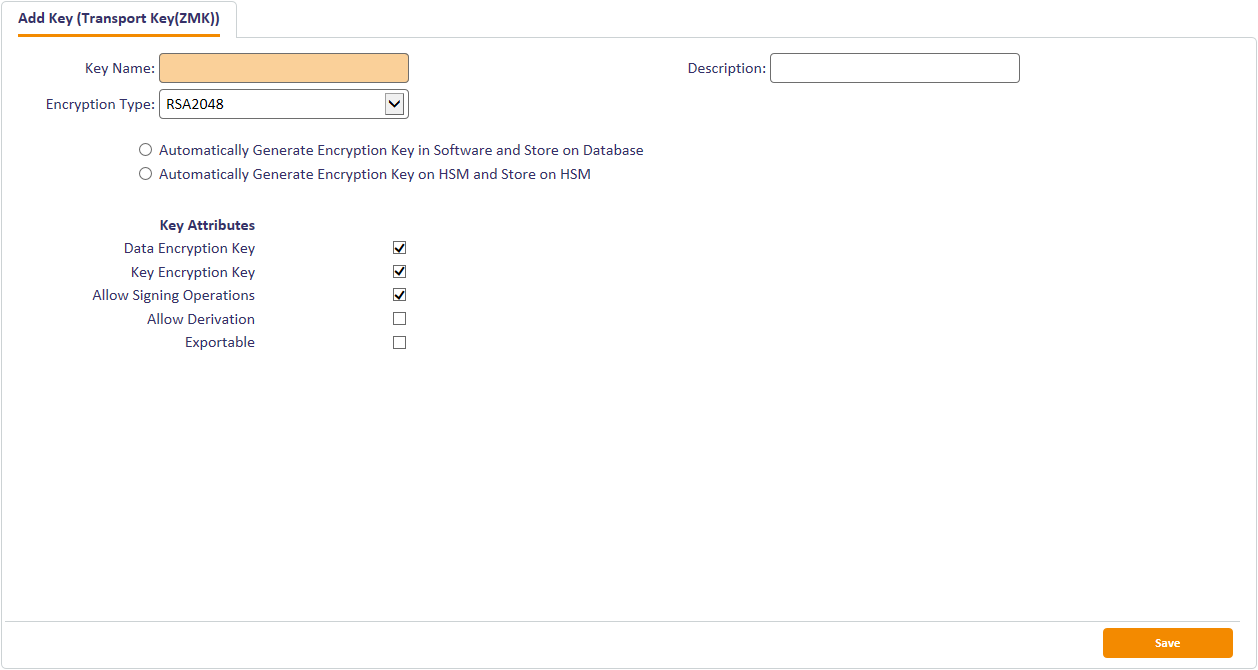
Note: If you select RSA2048 as the Encryption Type, the only options available are:
- Automatically Generate Encryption Key in Software and Store on Database
- Automatically Generate Encryption Key on HSM and Store on HSM (if your system is configured to use an HSM)
Once you have created the RSA 2048 key, you must export the public key so that you can send it to a third party; see section 16.3.1, Exporting RSA transport keys for details.

Note: You cannot edit or delete a key once you have entered it. However, if you add a key with the same name as an existing key, it replaces the previous version, and increases the Version number of the key.

16.2.2 Factory 9B keys
When PIV cards are manufactured, they are provided with a factory key. You will have been given this factory 9B key by your smart card supplier; this is either 32 or 48 characters in hexadecimal format.
-
From the Configuration category, select Key Manager.
You can also launch this workflow from the Configuration Settings section of the More category in the MyID Operator Client. See the Using Configuration Settings workflows section in the MyID Operator Client guide for details.
- From the Select Key Type to Manage list, select PIV 9B Card Administration Key and click Next.
- Click Add New Key.
- Select the Credential Type from the drop-down list. This is the type of card you are using.
-
Select the attributes for the key if required:
- Exportable – the key can subsequently be exported.
- Select Factory from the Key Type drop-down list. This means that you are using the key provided by your supplier.
-
From the Key Diversity drop-down list, select Static for static keys, or one of the Diverse options for diversified keys.
See the Smart Card Integration Guide for the key diversity option for your type of card.
-
From the Encryption Type drop-down list, select the encryption used.
See the Smart Card Integration Guide for the encryption option for your type of card.
Warning: Make sure you select the Encryption Type supported by the devices you are using. If you select the wrong length of key, you will not be able to issue cards.
- Type a Description for the key.
-
If you are storing the key in the database, choose one of the following options:
- Automatically Generate Encryption Key in Software and Store on Database – this option automatically creates an encryption key.
- Encryption Key – type the hexadecimal key in the box. Optionally, you can include the KeyChecksum Value.
- Use Key Ceremony – if you have the key in key ceremony format (encrypted by a Transport Key), select this option. When you click Enter Keys, the key ceremony wizard will launch, allowing you to enter the key ceremony data into the database.
-
If you are storing the key on an HSM, and have selected Diverse key diversity, select one of the following options:
- Automatically Generate Encryption Key on HSM and Store on HSM – this option generates a key on the HSM.
- Existing HSM Key Label – if you have an existing key on your HSM that you want to use, type its label.
- Use Key Ceremony – if you have the key in key ceremony format (encrypted by a Transport Key), select this option. When you click Enter Keys, the key ceremony wizard will launch, allowing you to enter the key ceremony data into the HSM.
Note: If an HSM is available, Intercede recommends it is used as it provides stronger protection for the key.
- Click Save.
16.2.3 Customer 9B keys
You can configure a customer 9B key for PIV systems. When issuing a card, MyID will change the factory 9B key to the customer 9B key.
Note: If the customer 9B key for a PIV card is not created, the card will continue to use the factory 9B key after issue. The factory 9B key may be known to third parties, so may not be secure. We recommend that a diverse customer 9B key is generated in the HSM for all PIV device types to be issued. PIV compliant installations must specify diverse customer 9B keys in the HSM.
This means that if you need to be able to reuse the card in different installations, you must cancel the card – canceling a card changes the customer 9B key back to the factory 9B key so the card can be reused.
Note: if you lose the key data held in the database, you will no longer be able to cancel or unlock the card.
-
From the Configuration category, select Key Manager.
You can also launch this workflow from the Configuration Settings section of the More category in the MyID Operator Client. See the Using Configuration Settings workflows section in the MyID Operator Client guide for details.
- From the Select Key Type to Manage list, select PIV 9B Card Administration Key and click Next.
- Click Add New Key.
- Select the Credential Type from the drop-down list. This is the type of card you are using.
-
Select the attributes for the key if required:
- Exportable – the key can subsequently be exported.
- Select Customer from the Key Type drop-down list.
-
Select Static, Diverse2, or Diverse108 from the Key Diversity drop-down list.
Intercede recommends using diverse 9B customer keys as this enhances the security of the solution.
See the Smart Card Integration Guide for the appropriate diversity option for your type of card. If the guide does not list the diversification algorithm for your card type, choose Diverse2.
- Select the same Encryption Type as you specified for the factory key.
- Type a Description for the key.
-
If you are storing the key in the database, choose one of the following options:
- Automatically Generate Encryption Key in Software and Store on Database – this option automatically creates an encryption key.
- Encryption Key – type the hexadecimal key in the box. Optionally, you can include the KeyChecksum Value.
- Use Key Ceremony – if you have the key in key ceremony format (encrypted by a Transport Key), select this option. When you click Enter Keys, the key ceremony wizard will launch, allowing you to enter the key ceremony data into the database or HSM (if available).
If you are storing the key on an HSM, and have selected Diverse key diversity, select one of the following options:
- Automatically Generate Encryption Key on HSM and Store on HSM – this option generates a key on the HSM.
- Existing HSM Key Label – if you have an existing key on your HSM that you want to use, type its label.
Note: If an HSM is available, Intercede recommends it is used as it provides stronger protection for the key.
- Click Save.
16.2.4 Application keys
Application keys are used to secure parts of the MyID application; typically, they are used for custom functionality. Your system may have been customized with a preset selection of key names for use with this functionality.
To add an application key:
-
From the Configuration category, select Key Manager.
You can also launch this workflow from the Configuration Settings section of the More category in the MyID Operator Client. See the Using Configuration Settings workflows section in the MyID Operator Client guide for details.
- From the Select Key Type to Manage drop-down list, select Application Key.
- Click Next.
-
Click Add New Key.
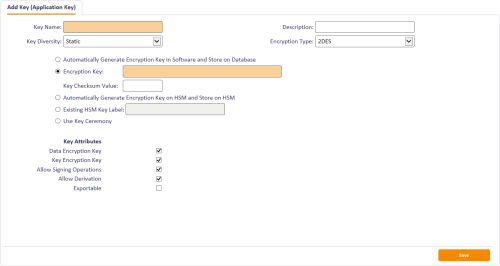
- Type the Key Name and Description.
-
Select an option from the Key Diversity drop-down list.
You can choose Static, which uses the same key for all purposes, or one of the Diverse options, which use a diversification algorithm for the key.
- Select the type of encryption from the Encryption Type drop-down list.
-
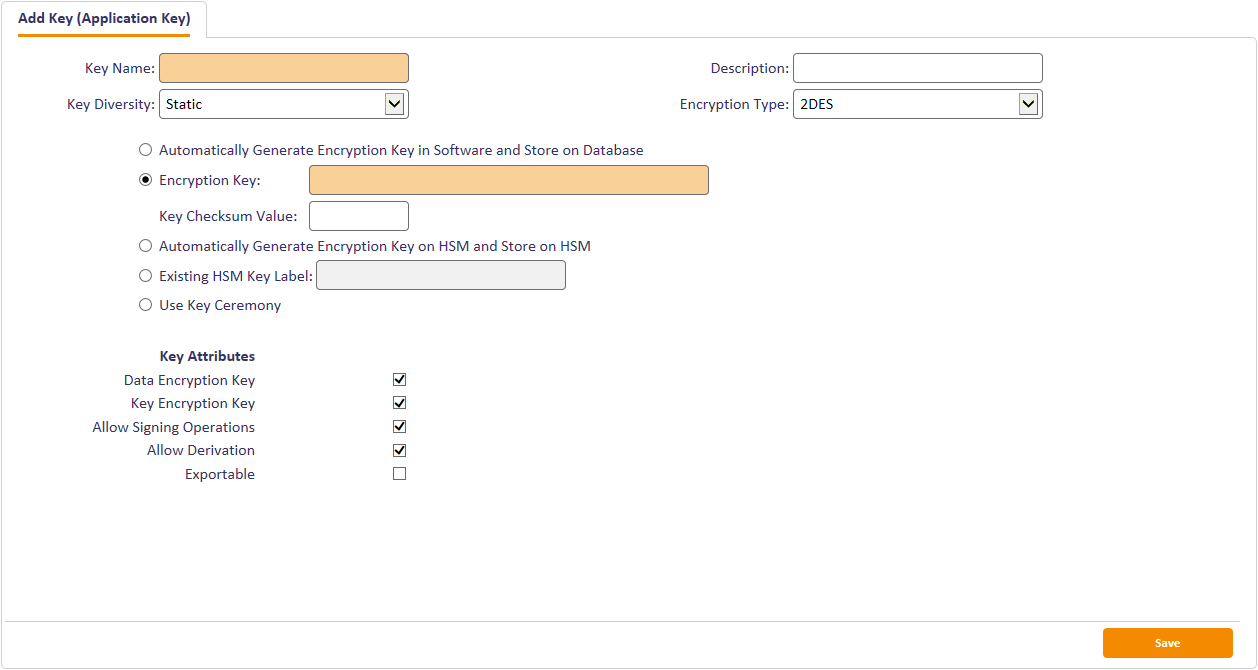
Select one of the following options:
- Automatically Generate Encryption Key in Software and Store on Database – the key is automatically generated and stored in the database.
- Encryption Key – type the key into the box. Optionally, you can include the KeyChecksum Value.
-
Automatically Generate Encryption Key on HSM and Store on HSM – this option generates a key on the HSM.
Note: The HSM options appear only if your system is configured to use an HSM.
- Existing HSM Key Label – if you have an existing key on your HSM that you want to use, type its label.
- Use Key Ceremony – click Enter Keys and provide the key in multiple parts. Alternatively, click Import Keys and select a file containing the key ceremony data.
-
Select the attributes for the key:
- Data Encryption Key – the key is used to encrypt data (DEK).
- Key Encryption Key – the key is used to encrypt keys (KEK).
- Allow Signing Operations – the key is used for signing.
- Allow Derivation – the key can be used to derive individual keys.
- Exportable – the key can subsequently be exported.
See section 16.2.5, Exporting keys for more information.
- Click Save.
16.2.5 Exporting keys
If your key has been created using the Exportable option, you can export it using the Key Manager workflow.
For information on exporting RSA transport keys to obtain the public key, see section 16.2.5, Exporting keys.
To export a key:
-
From the Configuration category, select Key Manager.
You can also launch this workflow from the Configuration Settings section of the More category in the MyID Operator Client. See the Using Configuration Settings workflows section in the MyID Operator Client guide for details.
-
From the Select Key Type to Manage drop-down list, select the type of key you want to export, and click Next.
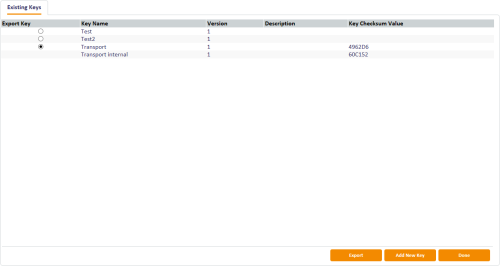
Keys that are exportable have a radio button available in the Export Key column.
- Select the key you want to export.
-
Click Export.
-
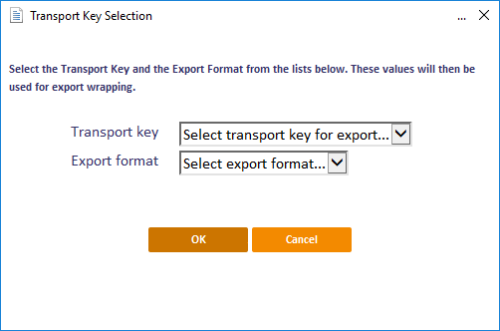
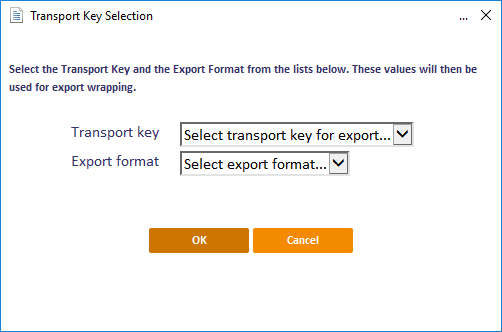
Select the transport key you want to use to encrypt the key.
If you are using a RSA key to secure the transport, select the Enter a Public Key option.
-
Select the export format:
- XMLenc – when you click OK, MyID saves the exported key to an XML file.
- KeyCeremony – when you click OK, MyID saves the exported key to a text file containing the key name, type, algorithm, transport key, encrypted key value and the checksum. For transport keys, MyID saves the exported key to three different text files containing fragments of the transport key; you can distribute these fragments to three trusted custodians, who can subsequently combine their fragments to import the transport key into another system.
Note: If you are using an RSA public key, you can select only the KeyCeremony option.
-
If you are using an RSA public key, provide the following additional information:
-
RSA Public Key – paste the exported public key from the PEM file for the RSA transport key.
-
Padding Type – select the type of padding you want to use on the encrypted key.
-
- Click OK, select the file to which you want to export the key, then click Save.

Note: There is a mandatory witness stage for key export. You must have another operator available who has the Witness Key Export permission under Key Manager set up in the Edit Roles workflow.
16.2.6 Entering keys using a key ceremony
Various key types allow you to enter the keys using a key ceremony.
To enter the key using a key ceremony:
- Click Enter Keys.
-
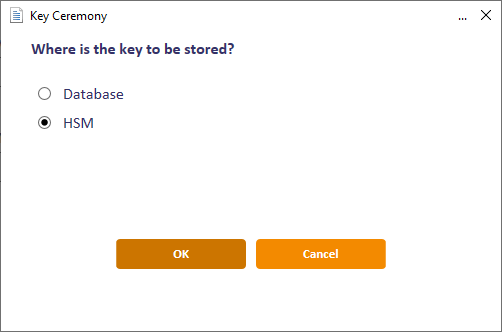
If you have installed support for an HSM, you are asked whether you want to store the key in the database or on the HSM.
If an HSM is available, Intercede recommends that you use it as it provides stronger protection for the key.

-
Select the location, then click OK.

-
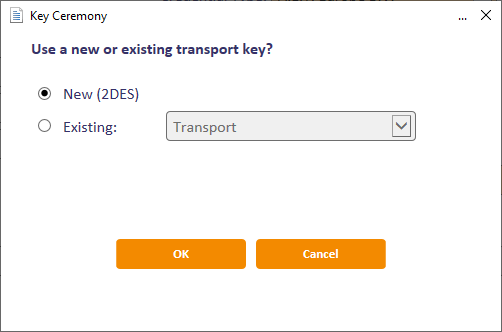
If you have previously stored a transport key using the Key Manager workflow, you can select this key from the Existing list, or select New to enter a new key.
See section 16.2, The Key Manager workflow for details of storing a transport key using the Key Manager workflow.

-
If you are using a new transport key, in the Key Ceremony dialog, enter the first part of the transport key.
You can optionally enter the Check Value to ensure that you have entered the transport key fragment correctly. Check values are usually provided for each fragment the supplier of the transport key.
- Click OK, then enter the second and third parts of the transport key.
-
Enter the encrypted master key.
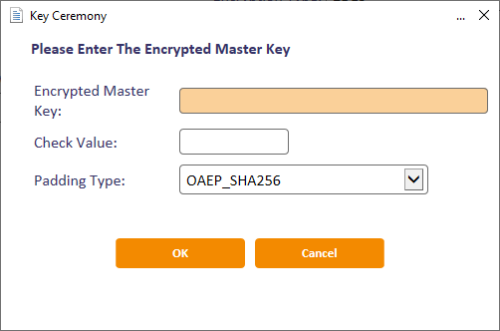
Note: You must select the Padding Type only if you are using an existing RSA transport key. This must match the padding used when the key was exported and encrypted with the public key. See section 16.3, Using RSA transport keys for details.


Alternatively, to import the key from an XML file:
- Click Import Keys.
-
Select the file containing the key information, then click Open.
Note: The file must be in XMLenc format.
-
Click Save.
16.2.7 Known issues
-
IKB-354 – Cannot enter non-hex characters as the HSM Key Label
A problem has been identified when entering HSM Key Labels that include non-hexadecimal characters such as hyphen (-), causing failure to update MyID with the key reference.
Error: There has been an error entering keys
Cause: The key data you are entering may be incorrect
Solution: Check an re-enter your keys and/or checksums
For assistance with this issue, contact Intercede customer support quoting reference IKB-354.